
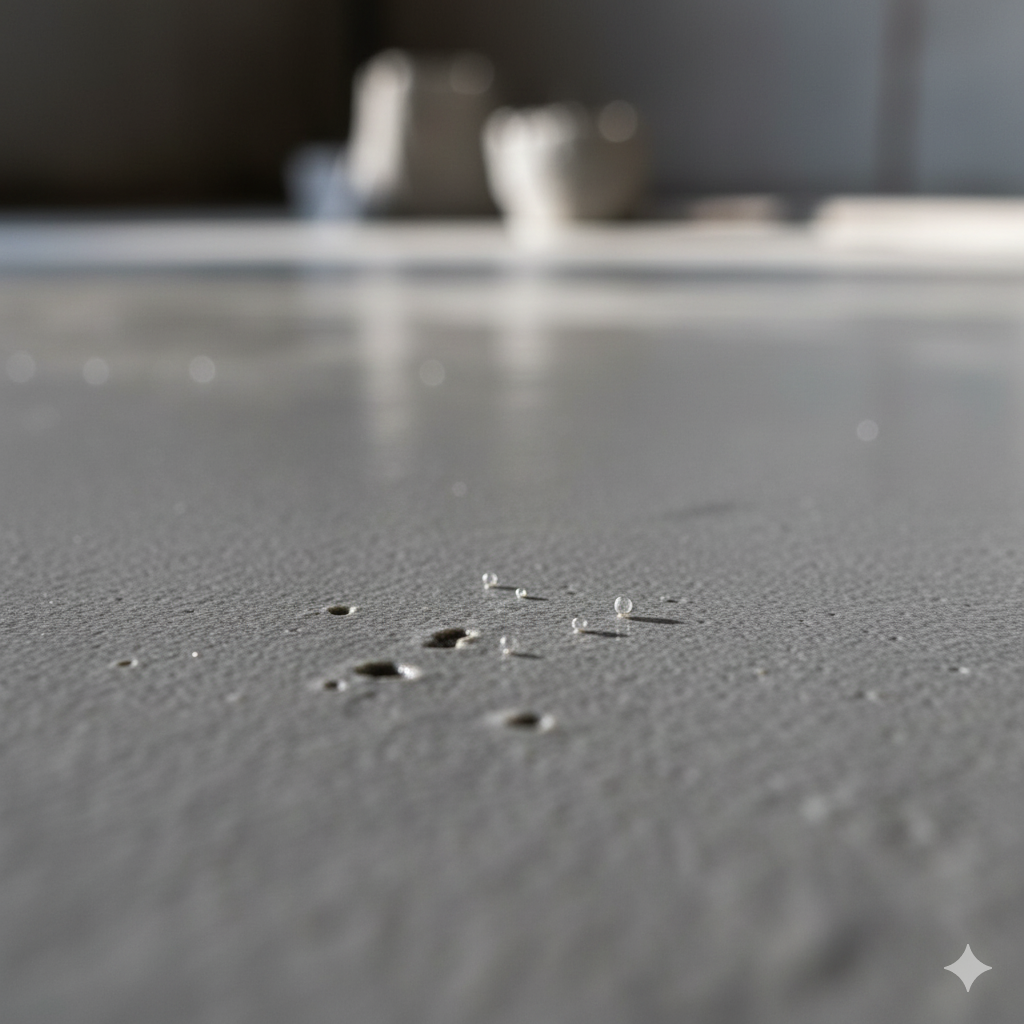
You’ve invested time and money into creating the perfect foundation for your new flooring. You mix the self-levelling compound, pour it with precision, and wait for that flawless, glass-like finish you’ve seen in design magazines. But as it dries, you spot them: tiny, frustrating bubbles and pinholes marring the surface. What went wrong?
For homeowners and renovators across Sydney and greater NSW, this is a surprisingly common issue. The dream of a perfect substrate for those new engineered timber floors or luxury vinyl tiles can quickly become a minor nightmare. But don’t worry, understanding the cause is the first step to prevention and repair. At Elyment Group, we believe a perfect finish starts from the ground up.
The Culprits: Why Do Bubbles and Pinholes Form in Floor Leveller?
These surface imperfections are almost always a result of trapped air or gas escaping from the subfloor (the concrete slab beneath) as the levelling compound cures. Think of it like a fizzy drink—if you shake it up, bubbles will rush to the surface. A similar principle applies to your floor. Here are the main causes we see in NSW properties.
1. Porous Concrete Substrates
Most concrete slabs are porous, meaning they contain a network of tiny air pockets. When you pour a liquid leveller over the top, the weight of the compound displaces this air.
- The Process: The trapped air pushes its way up through the curing compound, creating pinholes or bubbles as it escapes. This is especially common in older Sydney homes with aged concrete.
- The Solution: Proper priming and sealing of the substrate is non-negotiable.
2. Moisture in the Concrete Slab
The climate in NSW, from the humidity of a Sydney summer to coastal dampness, can significantly impact moisture levels in a concrete slab. If the slab has a high moisture content or isn’t fully cured, that water vapour will try to escape.
- The Process: This escaping vapour, known as off-gassing, creates pressure under the leveller, resulting in bubbles.
- The Solution: A professional moisture test is crucial before any work begins. A moisture barrier may be required.
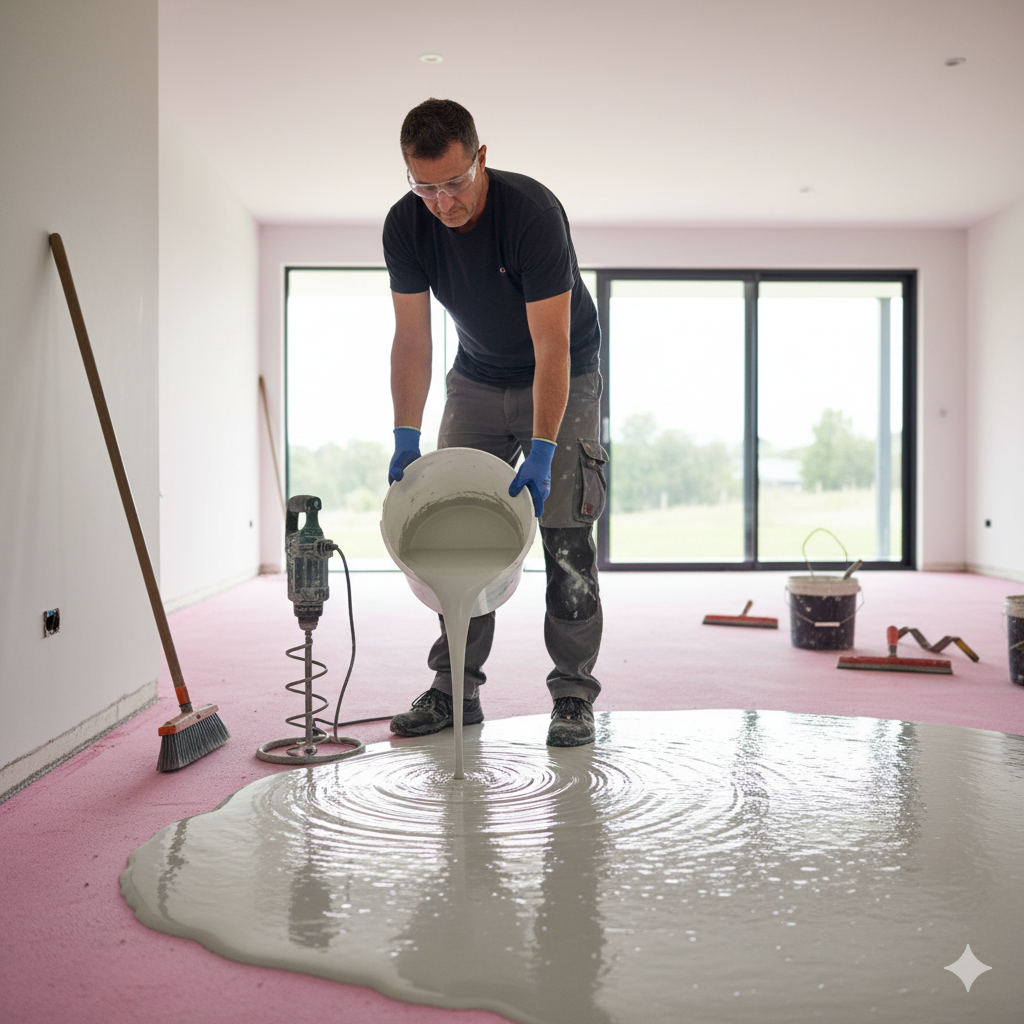
3. Incorrect Mixing Technique
How you mix the compound matters. It’s not just about adding water to powder.
- The Mistake: Mixing too fast or with the wrong type of paddle can whip excess air into the mixture. This is ‘mechanical entrapment’ of air.
- The Fix: Use a low-speed drill (under 500 RPM) and a specialised mixing paddle designed to fold, not whip, the product. Let the mixture stand for a minute or two after mixing to allow entrapped air to escape before pouring.
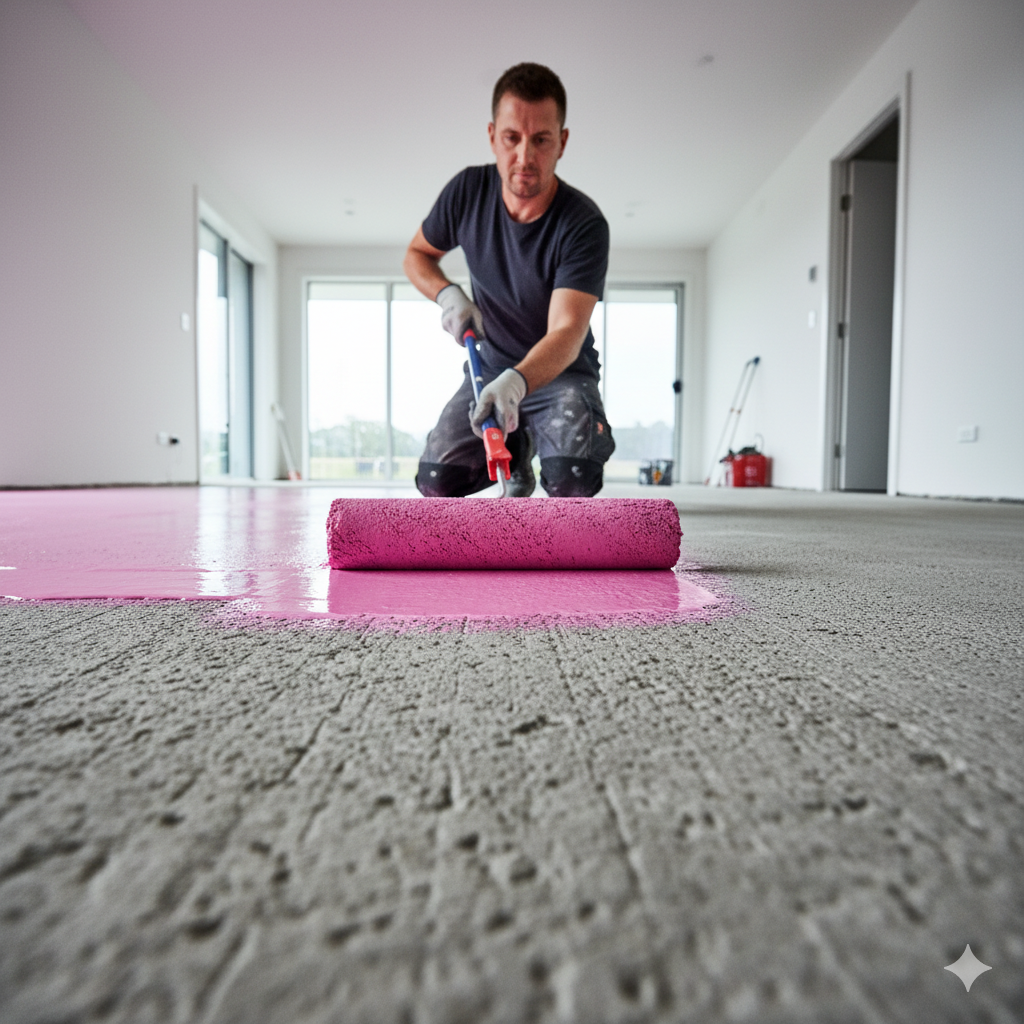
4. Primer Issues
Primer is the unsung hero of floor levelling. It seals the porous substrate and creates a strong bond. Using the wrong primer, or not using one at all, is a recipe for disaster.
- The Problem: An unprimed or incorrectly primed floor won’t stop air from escaping the slab. Some primers are designed to be applied in two coats to properly seal the surface.
- Best Practice: Always use the primer recommended by the manufacturer of your self-levelling compound. Follow the application instructions to the letter.
Prevention: Your Checklist for a Flawless Finish
As with most things in construction, prevention is far easier and cheaper than a cure. Are you planning a flooring project in your NSW home? Here’s how to get it right the first time.
- Substrate Preparation is Everything: Ensure the concrete is clean, free of dust, oils, and old adhesives. Grind the surface if necessary.
- Test for Moisture: Don’t skip this. It’s the only way to know what’s happening inside your slab.
- Prime, Prime, Prime: Apply the correct primer as per the manufacturer’s guidelines. For very porous slabs, a second coat might be needed.
- Mix with Care: Use a low-speed drill and the right paddle. Allow the mix to slake (rest) before pouring.
- Control the Environment: Avoid levelling in extreme heat or direct sunlight, which can cause the compound to cure too quickly and trap air.
Repairing Minor Bubbles and Pinholes
If you’re facing minor imperfections, all is not lost. For small, localised areas:
- Step 1: Lightly sand the affected area to open up the pinholes.
- Step 2: Vacuum all dust thoroughly.
- Step 3: Apply a fine finishing compound or a skim coat over the area with a flat trowel, forcing it into the holes.
- Step 4: Once cured, sand it smooth for a seamless finish.
For widespread bubbling, the issue is more serious and may require grinding and reapplying a new layer. This is where professional help is invaluable.
Key Takeaways for NSW Homeowners
- Bubbles and pinholes are caused by escaping air or moisture from the concrete slab.
- The porous nature of concrete and NSW’s climate make proper preparation essential.
- Never skip the primer. It’s the most critical step for prevention.
- Correct mixing technique prevents adding extra air into the compound.
- For a guaranteed perfect finish, especially for large or complex areas, consulting a professional is your best investment.
A beautifully laid floor can transform a home, but its longevity and aesthetic appeal depend entirely on the foundation beneath it. Don’t let bubbles and pinholes compromise your project.