
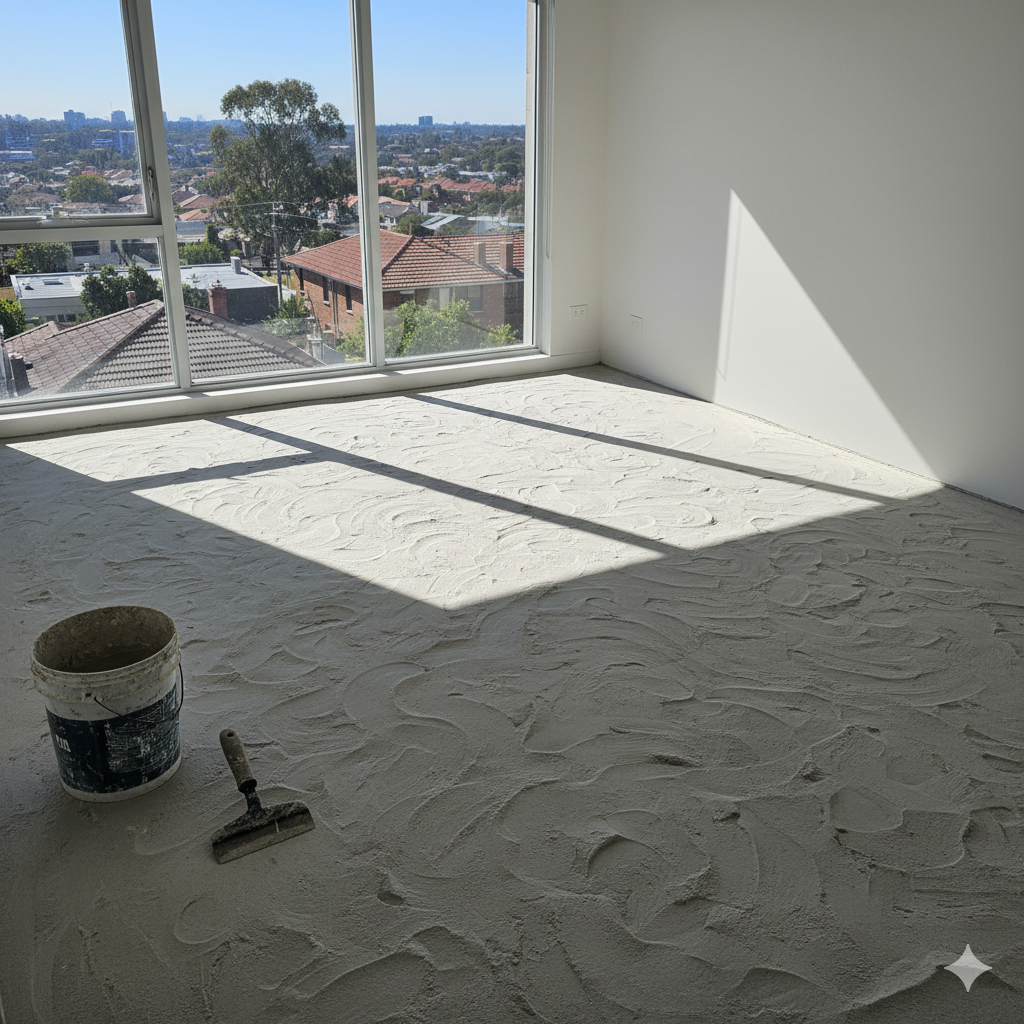
There’s a unique sinking feeling that comes with stepping back to admire your DIY handiwork, only to find your perfectly planned self-levelling project looks more like a lunar landscape. You’re not alone. Many Sydney homeowners have faced the frustrating reality of a botched self-levelling job—the lumps, the trowel marks, the uneven finish. But before you despair, know this: it’s almost always fixable.
So, was your dream of a flawless foundation for your new timber or tile flooring just a fantasy? Not at all. With the right approach and a bit of grit, you can turn that uneven mess into the smooth, professional-grade surface you originally envisioned. This guide will walk you through the essential repair steps, tailored for floors right here in NSW.
Why Did My Self-Levelling Go Wrong? Common Culprits
Understanding the ‘why’ is the first step to a successful ‘how’. Did you find yourself making one of these common mistakes?
- Improper Mixing: Too little water results in a thick, unworkable mix that doesn’t flow. Too much, and the compound’s strength is compromised, leading to a weak, dusty surface.
- Wrong Tools: Using a simple bucket and stick? That’s often the primary cause of lumps. A powered paddle mixer is non-negotiable for a silky-smooth consistency.
- No Primer: Applying self-leveller to an unprimed concrete slab is a recipe for disaster. The porous concrete can suck the water out of the mix too quickly, causing it to set before it has a chance to level out, leading to bubbles and a poor bond.
- Pouring Too Thin: Every product has a minimum required thickness. Pouring below this can result in cracking and delamination.
- Overworking the Surface: It’s called “self-levelling” for a reason. Excessive trowelling or rolling can create more problems than it solves, leaving marks and high spots.
Your Toolkit for a Flawless Fix
Before you begin the repair, gather your gear. Having everything on hand will make the process smoother and safer.
- Safety First: High-quality dust mask (P2/N95), safety glasses, gloves, and ear protection.
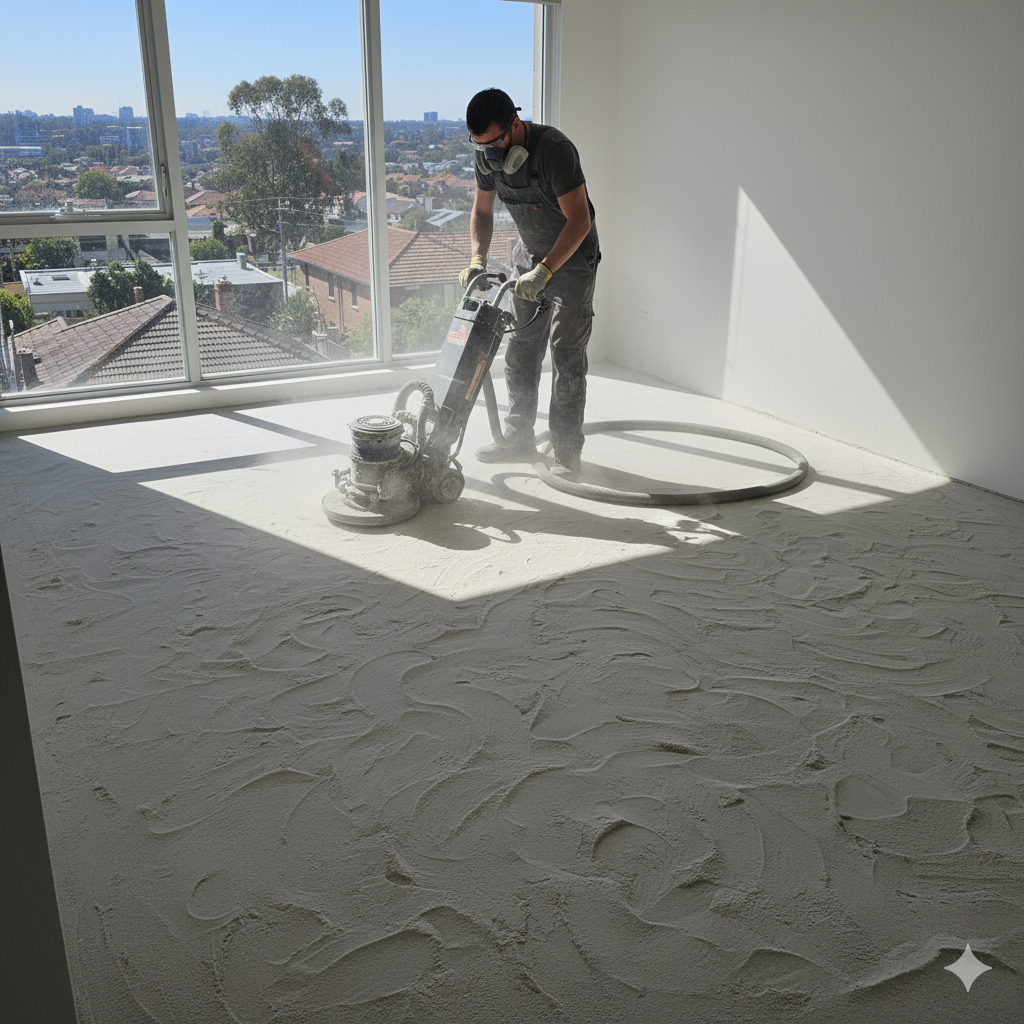
- The Heavy Hitter: A concrete grinder with a diamond cup wheel. You can hire these from local equipment suppliers across Sydney.
- Assessment Tools: A long, straight edge (at least 2 metres) and a spirit level.
- Cleaning Crew: An industrial vacuum with a dust extractor attachment.
- Repair Materials: A high-quality cement-based patching compound for low spots, the correct primer for your slab, and a new batch of self-levelling compound.
The Step-by-Step Repair Guide for Your Sydney Floors
Ready to reclaim your floor? Let’s break down the process into manageable steps.
Step 1: Assess the Damage (and Your Patience)
Use your straight edge and spirit level to map out the battlefield. Identify the high spots (peaks) and the low spots (valleys). Mark them clearly with a pencil or chalk. This map will be your guide.
Step 2: Grind Down the High Spots
This is where the real work begins. Attach the diamond cup wheel to your concrete grinder and connect your dust extractor—concrete dust is hazardous and gets everywhere. Systematically grind down all the marked high spots and any sharp trowel ridges. Your goal is to get the entire surface relatively uniform, removing the peaks so they’re level with the lowest original points.
Pro Tip: Keep the grinder moving constantly to avoid creating divots. Let the machine do the work.
Step 3: A Thorough Clean and Filling the Lows
Once the grinding is done, vacuum the entire area meticulously. Any remaining dust will compromise the bond of your new layers. For any deep valleys or divots remaining, use the cement-based patching compound. Mix it to a peanut-butter consistency and trowel it into the low spots, feathering the edges to blend with the surrounding floor.
Step 4: Prime, Prime, Prime!
Do not skip this step again! Applying the correct primer is crucial. It seals the porous concrete and ensures the new self-levelling compound bonds perfectly without drying too quickly. Apply an even coat (or two, if your slab is extra porous) as per the manufacturer’s instructions and let it dry completely.
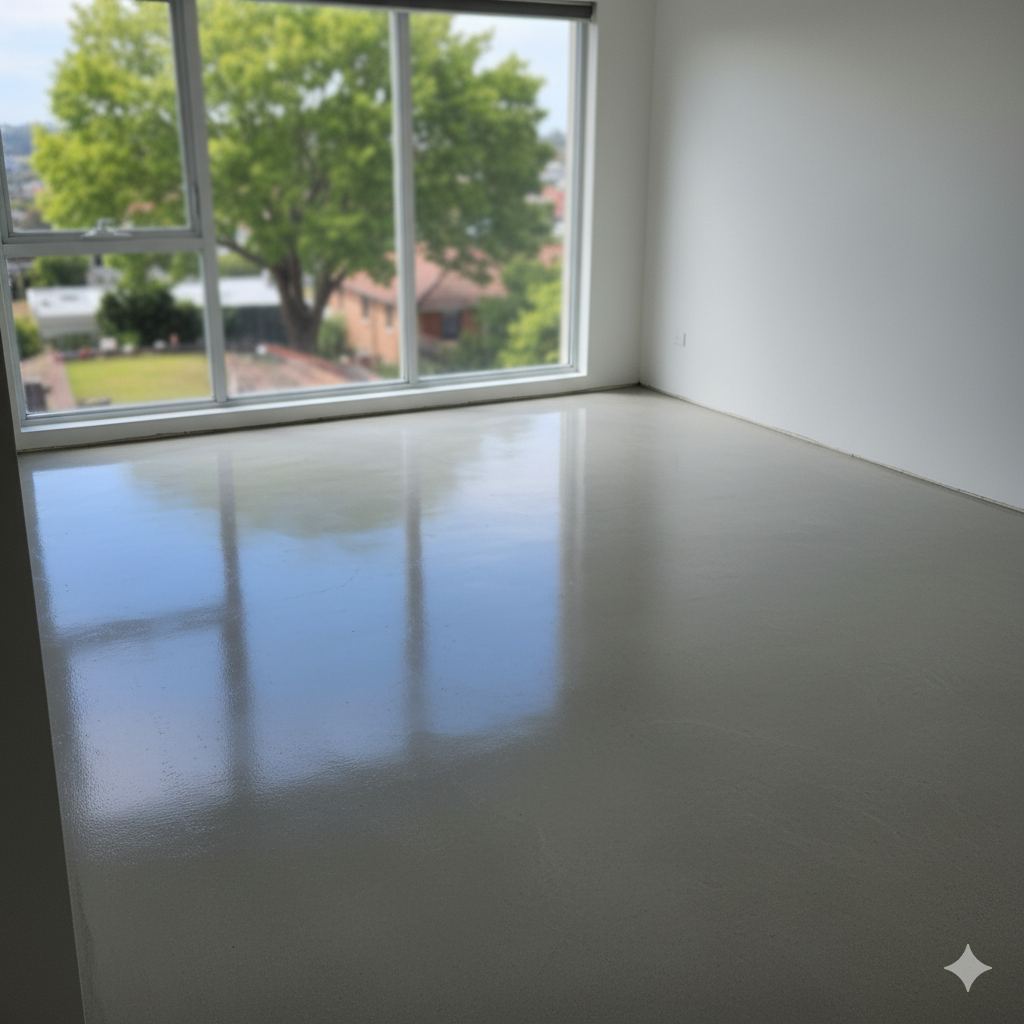
Step 5: The Redemption Pour
It’s time for round two. This time, mix the self-levelling compound precisely according to the bag’s instructions. Use a measuring jug for water and a powered paddle mixer for at least two minutes until the mix is completely lump-free. Pour the compound onto the floor, starting from the furthest corner, and gently guide it with a spiked roller or smoothing trowel. Let it do its job and resist the urge to overwork it.
When to Call the Pros in Sydney?
DIY is rewarding, but sometimes a project is bigger than anticipated. If the unevenness is severe, if you suspect deeper issues with your subfloor, or if you simply want a guaranteed perfect finish, it might be time to call in the experts. A professional team has the high-end equipment and experience to rectify the situation efficiently. Don’t hesitate to reach out to a specialist like Elyment Group for a professional assessment and a stress-free solution.
Key Takeaways for Fixing Your Floor
- Assess First: Map out highs and lows before you start.
- Grind, Don’t Just Fill: You must remove the high spots for a truly level surface.
- Cleanliness is Key: Dust is the enemy of a strong bond.
- Primer is Non-Negotiable: It’s the secret to a successful pour.
- Measure and Mix Perfectly: Follow the manufacturer’s instructions to the letter.
Fixing a botched self-levelling job is a tough but achievable task. By following these steps, you can rescue your Sydney floors and get your renovation project back on track. For more tips, follow us on X @ElymentGroup or visit us at elyment.com.au.