
There’s nothing more frustrating. Your flooring project is on the home stretch. The self-levelling compound has been poured, you’re expecting a perfectly smooth, hard surface, but instead, you find soft, tacky spots that refuse to cure. In a climate as unique and challenging as New South Wales, from the humid coast of Sydney to the varied inland regions, this is an all-too-common headache for tradies and DIYers alike.
So, what’s going wrong? Is it the product, the preparation, or is the infamous Sydney humidity playing saboteur with your project?
At Elyment Group, we’ve seen it all. Let’s dive into the common culprits behind self-levelling compound not hardening and give you a clear, actionable plan to achieve that flawless, rock-solid finish every time.
Why is My Self-Leveller Still Soft? The Common Culprits
Before you blame the product, let’s investigate the process. The hardening of a cementitious self-levelling compound is a chemical reaction (hydration), not just a drying process. Several factors, especially prevalent in NSW, can throw this delicate balance off.
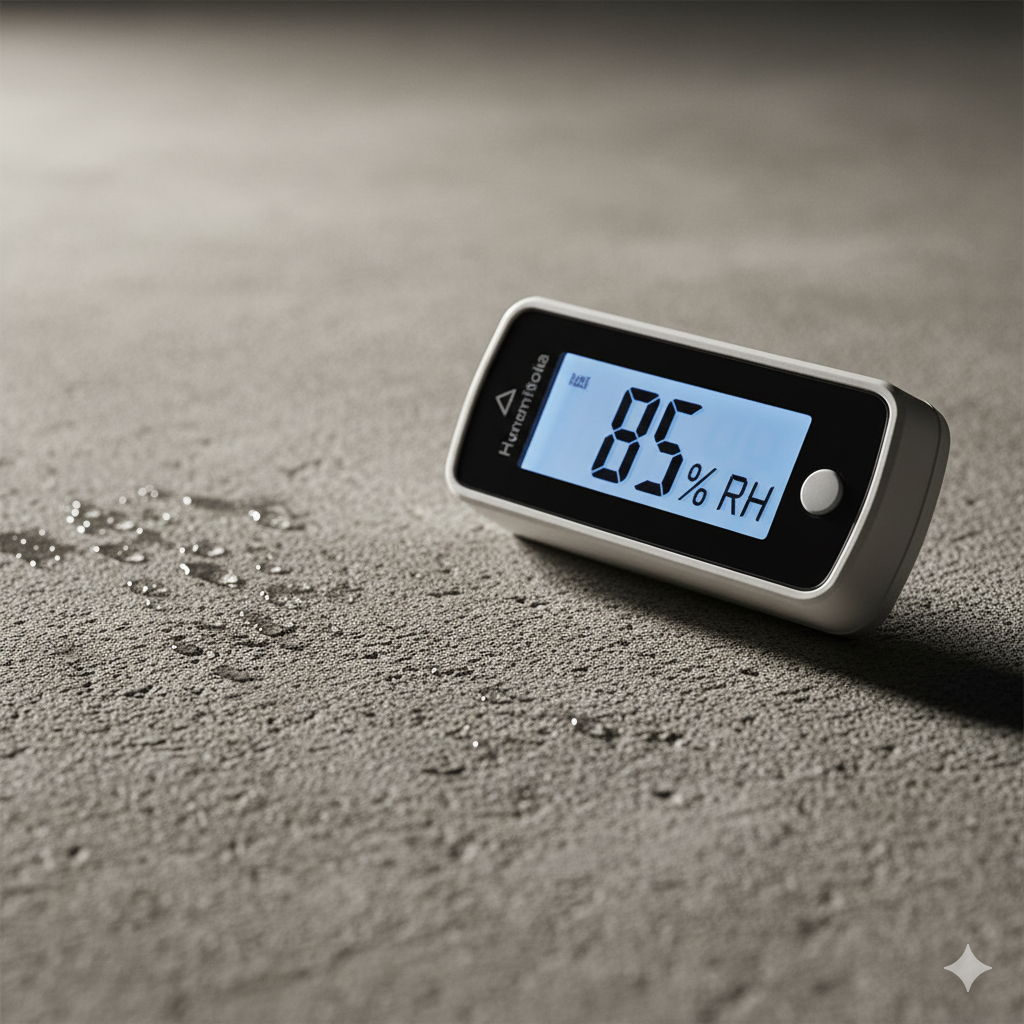
The Climate Factor: Sydney’s Humidity Trap
High humidity is public enemy number one for curing floors. When the air is already saturated with moisture, the water in the levelling compound can’t evaporate effectively. This slows the chemical hydration process to a crawl, leading to extended curing times and persistent soft spots. A winter pour on a cold, damp day can be just as problematic as a sticky summer afternoon.
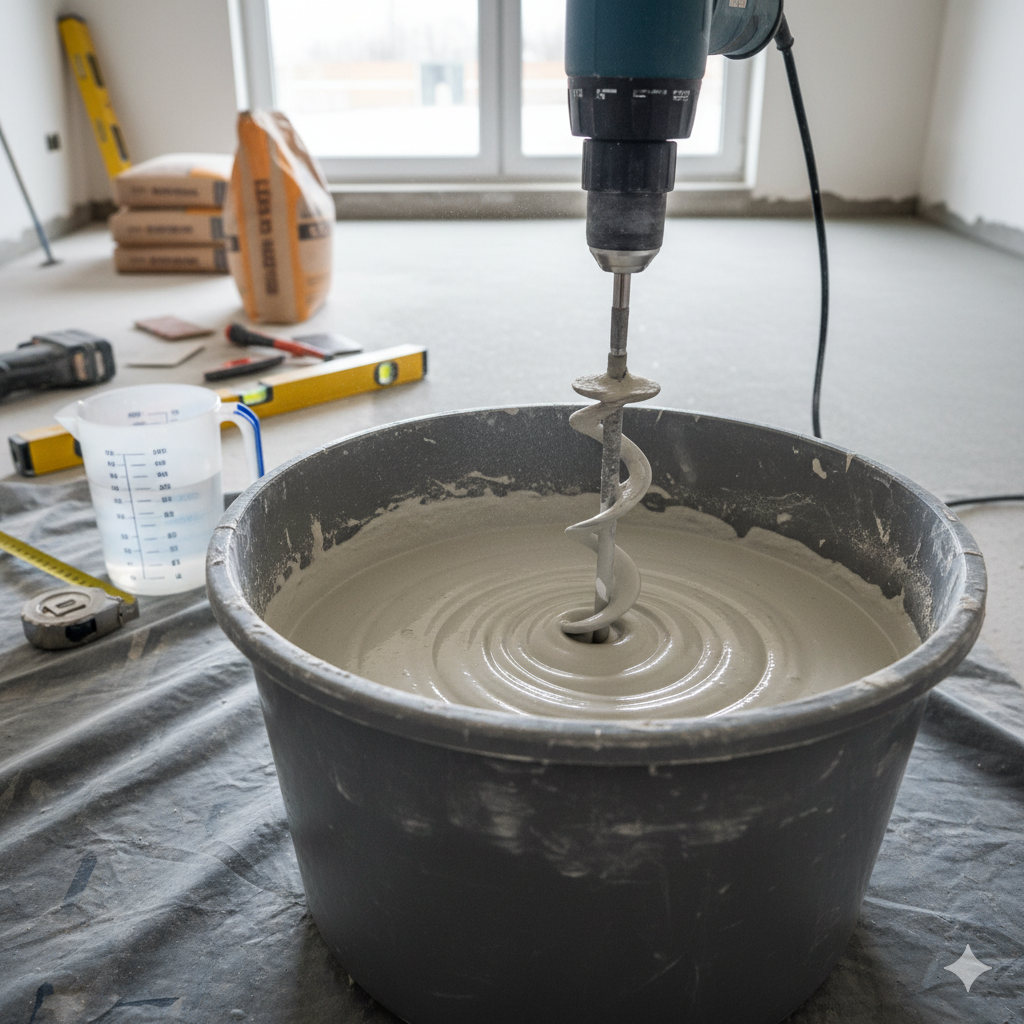
The Water Ratio Woe
It might be tempting to add a little extra water to make the compound flow better, but this is a critical mistake.
- Weakens the Mix: Excess water dilutes the polymer and cement ratio, resulting in a weaker final product that may never reach its specified compressive strength.
- Causes Segregation: The heavier aggregates can sink, leaving a soft, chalky layer (laitance) on the surface.
Always follow the manufacturer’s specifications to the letter. Measure your water precisely.
Subfloor Sabotage: Contaminants and Moisture
Your self-leveller is only as good as the surface it’s applied to. A poorly prepared subfloor can completely derail the curing process.
- Moisture from Below: Concrete slabs, especially in older Sydney properties, can hold significant moisture. If a proper moisture barrier or primer isn’t used, this moisture can migrate up, oversaturating the compound from beneath.
- Contaminants: Dust, oil, grease, old adhesives, or even cleaning residues can create a barrier, preventing the compound from bonding and curing correctly.
The Primer Problem
Skipping the primer is a false economy. Primers are crucial for two main reasons:
- They seal porous surfaces, preventing the subfloor from sucking the water out of the mix too quickly.
- They act as a bonding agent, ensuring the leveller adheres powerfully to the subfloor.
Using the wrong type of primer, or applying it incorrectly, can be as bad as using none at all.
Your Troubleshooting Checklist: A Step-by-Step Guide
Found a soft spot? Don’t panic. Work through this checklist to diagnose the issue.
- Assess the Environment: Check the room’s temperature and humidity. If it’s too humid or cold, introduce a dehumidifier or industrial fan (once the surface has set enough not to be marked by the airflow) and gentle heating to create a more controlled environment.
- Check Your Mix: Were the water ratios exact? Was the product within its use-by date? Old product can lose its chemical potency.
- Investigate the Subfloor: If possible, check the areas around the soft spots. Does the subfloor look different? Could there have been a spill or contamination you missed?
- Review the Product Specs: Double-check the technical data sheet (TDS) for the product. Note the specified curing times based on temperature and humidity. You might just need to give it more time in NSW’s challenging conditions.
When to Call in the Experts
Sometimes, a soft spot is a symptom of a deeper issue, like excessive hydrostatic pressure from the slab or a fundamental product incompatibility. Trying to fix it without a proper diagnosis can lead to a bigger, more expensive failure down the line.
If you’re facing a flooring dilemma that has you stumped, it’s time to bring in the professionals. The team at Elyment Group specialises in diagnosing and resolving complex flooring challenges across NSW. We provide precision solutions to ensure your project stands on a solid foundation.
Key Takeaways
- NSW’s climate, especially Sydney’s humidity, is a major factor in self-leveller curing times.
- Precise water measurement is non-negotiable for strength and proper curing.
- A clean, dry, and correctly primed subfloor is the foundation of a successful pour.
- Always consult the product’s technical data sheet before you start.
- When in doubt, professional advice from experts like Elyment Group can save you time, money, and stress.
Don’t let soft spots sink your project. With the right preparation and knowledge, you can achieve a perfect floor, every time. You can find us on X as @ElymentGroup or visit our website at elyment.com.au.