Magnesite Removal Sydney Near Floor-to-Ceiling Windows: How Are Aluminium Frames Protected During Demolition?
Learn how aluminium window frames are protected during magnesite removal in Sydney, reducing damage risks from demolition, tools, dust, and debris near glazing.
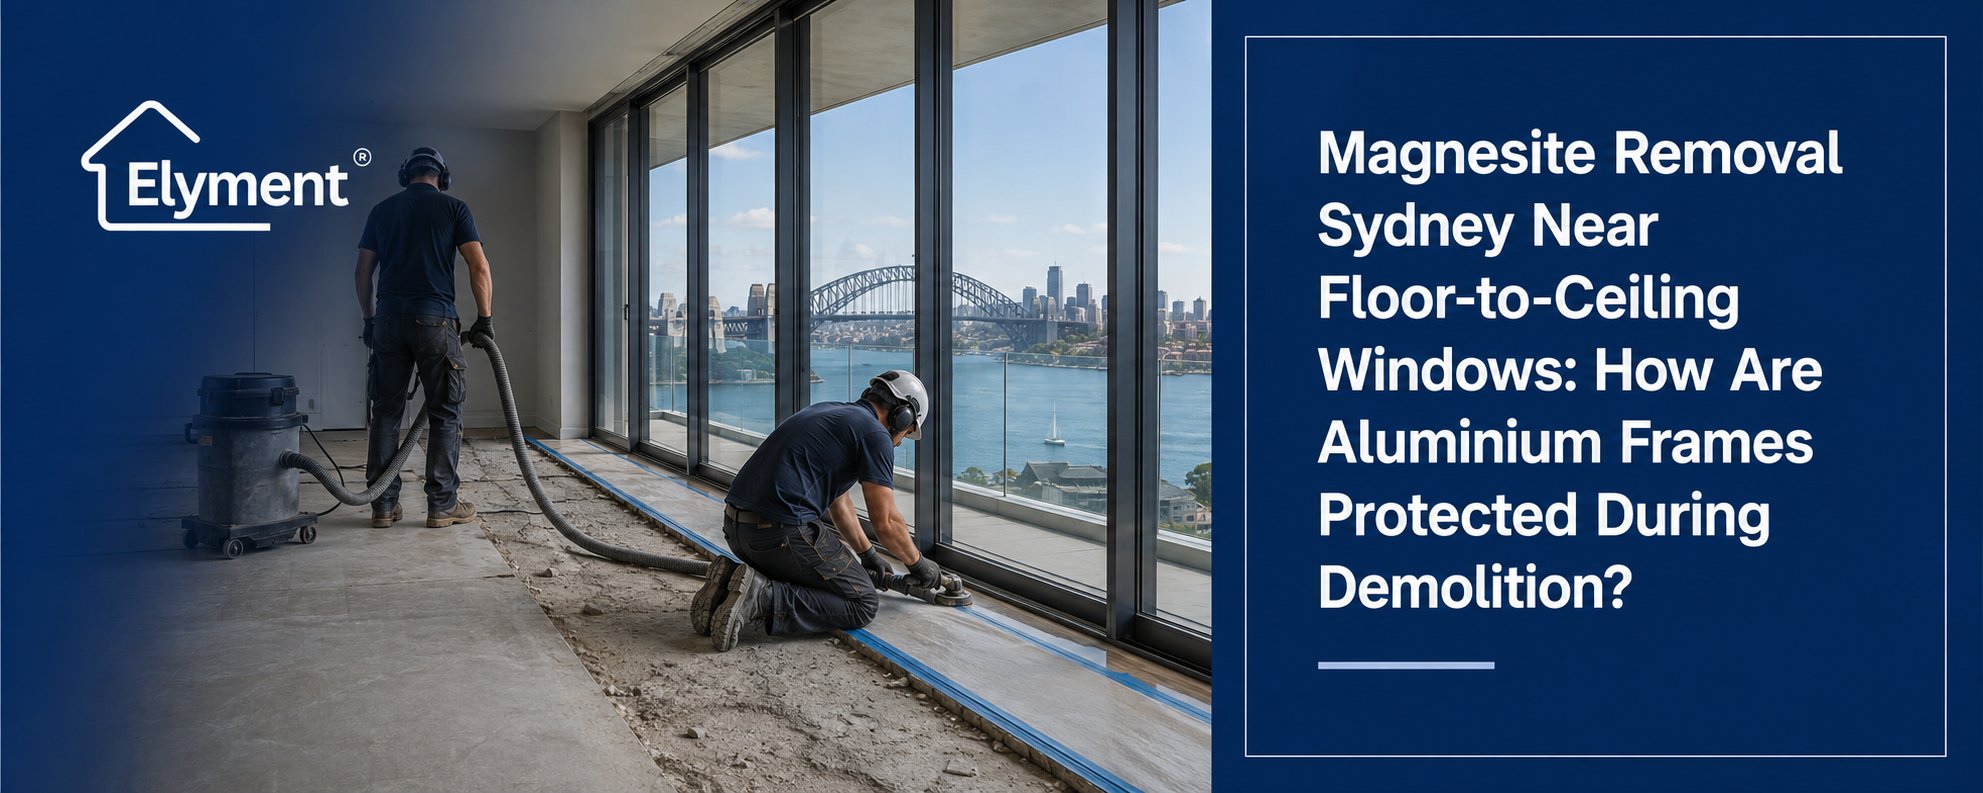
During magnesite removal beside floor-to-ceiling windows, aluminium frames should be treated as a protected building interface rather than simply the edge of the demolition area. In Sydney apartments, this usually means documenting existing frame conditions, installing non-abrasive impact protection, establishing a controlled perimeter work zone, using smaller equipment near the glazing and keeping broken material away from tracks and frames. Strata responsibility should also be confirmed before work begins.
Floor-to-ceiling glazing changes the character of a magnesite removal project.
Across the open centre of a Sydney apartment, removal productivity is largely determined by the thickness and condition of the existing floor, the equipment being used, waste handling and the state of the concrete underneath. Along a glazed façade, however, the controlling issue becomes precision.
A breaker, scraper or grinder only has to travel slightly beyond its intended working line for a flooring project to become a window, door or façade rectification problem.
That risk is particularly relevant in premium Sydney apartments where full-height aluminium glazing may run continuously across living rooms, bedrooms and balcony openings. Anodised or powder-coated frames, slender door tracks, glazing seals and finished façade components sit immediately beside material that is being mechanically broken apart.
The practical solution is not simply to "be careful". The interface needs its own protection and demolition sequence.
The Most Sensitive Part Of The Job May Be The Last Strip Along The Window
Large open areas generally allow removal equipment to work with predictable clearance. The perimeter behaves differently.
Near floor-to-ceiling glazing, several risks converge within a narrow working zone:
- Impact from breakers, chisels or loose demolition fragments.
- Scratching caused by grit moving against aluminium finishes.
- Damage to recessed sliding-door tracks.
- Dust collecting inside drainage channels and frame recesses.
- Grinding equipment contacting metal components.
- Waste being temporarily stacked against glazing or frames.
- Existing scratches being incorrectly attributed to the demolition works.
- Changes in floor height becoming significant beside fixed door and window thresholds.
This is why the perimeter should be considered separately when a Sydney magnesite removal scope is being prepared.
Square metres describe how much floor needs to come out. They do not fully describe how difficult the interfaces will be.
Protection Starts Before Any Demolition Equipment Is Switched On
The first control is documentation.
Before temporary protection covers the glazing interface, the project team should record the visible condition of the aluminium frames, tracks, seals and adjacent finishes. High-resolution photographs are particularly useful around corners, bottom rails and sliding-door thresholds where previous scratches, dents or coating damage may already exist.
The condition survey serves two purposes. It identifies vulnerable areas that require additional protection, and it creates a reference point for the final handover.
A practical pre-demolition record may include:
- Full photographs of each glazed wall or door opening.
- Close-up photographs of the bottom aluminium rail.
- Existing scratches, dents, chips or coating damage.
- Sliding-door tracks and drainage channels.
- Sealant joints between aluminium and surrounding construction.
- The existing floor-to-frame junction.
- Any previous patching or repairs immediately beside the frame.
- The height relationship between the magnesite, concrete substrate and threshold.
Protection can then be installed without hiding the condition that existed beforehand.
What Actually Protects The Aluminium?
There is no single protection product that suits every window system. The objective is to create several layers of defence without introducing another source of damage.
- Vertical aluminium frames
- Main risk: Scratching, impact and demolition fragments.
- Typical protection principle: Non-abrasive temporary protection with a more rigid sacrificial outer layer where impact exposure warrants it.
- Bottom aluminium rail
- Main risk: Tool contact and grit abrasion.
- Typical protection principle: Protected perimeter zone with physical separation from the active demolition face.
- Sliding-door track
- Main risk: Dust, chips and damaged track edges.
- Typical protection principle: Temporary cover that prevents debris entering the channel while remaining removable for inspection and cleaning.
- Glass immediately above floor level
- Main risk: Flying fragments and accidental impact.
- Typical protection principle: Independent impact protection that does not rely on loading or leaning heavy materials directly against the glazing.
- Frame sealant joints
- Main risk: Tearing or accidental cutting.
- Typical protection principle: Visible exclusion from cutting and scraping paths.
Adhesive selection also matters. Temporary tapes and films should not simply be attached to finished aluminium because they are available on site. Compatibility with the existing finish should be considered, particularly on high-value powder-coated or anodised assemblies.
Where direct attachment is unsuitable or uncertain, protection can be designed around sacrificial boards, adjacent protected surfaces or freestanding barriers rather than placing unnecessary adhesive directly onto the frame.
The protection system should remain inspectable. A frame hidden behind improvised cardboard for several days without the ability to check the bottom edge is not necessarily well protected.
The Demolition Sequence Should Move From Open Floor To Controlled Perimeter
A useful operational principle is to avoid treating the entire room as one identical demolition field.
Instead, the open floor and the façade perimeter can be worked differently.
- Document the glazing interface.
- Record frames, tracks, existing damage and floor heights before protection is installed.
- Install the protection package.
- Protect aluminium, low-level glass, door tracks and adjoining finishes before demolition fragments begin moving through the room.
- Establish a perimeter control band.
- Identify the area where normal production equipment will no longer be used in the same manner as the open floor.
- Remove the open floor first.
- Create working space, expose the substrate and establish a controlled route for waste without crowding the glazing.
- Reduce tool scale near the façade.
- Move to equipment and methods that provide greater control as the demolition reaches frames, tracks and external openings.
- Complete detailed edge preparation separately.
- Mechanical scraping, residual material removal and subsequent concrete preparation should remain controlled around the fixed interface.
- Clean, inspect and document.
- Remove trapped debris, inspect the frame and record the completed interface before protection is finally taken away.
This sequencing means the most vulnerable portion of the work is completed after the room has already been cleared sufficiently to provide better visibility and equipment control.
Why Large Demolition Machines Should Not Dictate The Final Edge
Productivity equipment has an important role in floor removal, but the tool that is most efficient across an open slab is not automatically the right tool beside a glazed façade.
The perimeter may require smaller breakers, compact scraping equipment, controlled hand tooling or smaller grinding equipment depending on the material that remains after the main removal stage.
The same principle applies after magnesite removal when the concrete requires preparation. Elyment's analysis of concrete grinding edge work around door tracks and fixed interfaces explains why perimeter preparation should be treated separately from broad-area grinding.
At the glazing line, speed is secondary to control.
Attempting to gain a small productivity advantage by pushing large equipment too close to a fixed aluminium assembly can create a disproportionate rectification risk.
Waste Management Is Part Of Window Protection
Window protection is often discussed only in terms of what sits directly over the frame. The movement of removed material can be equally important.
Broken magnesite should not accumulate against the façade while the rest of the room is being cleared. Loose fragments, grit and demolition equipment can repeatedly contact the protected interface when waste is allowed to build up along the perimeter.
A better working arrangement establishes a waste direction away from the glazing.
The room effectively develops three zones:
- Active demolition zone: Where material is currently being removed.
- Protected façade zone: Where glazing, frames and tracks remain isolated from routine material movement.
- Waste route: The controlled path from the workface towards bags, bins, lifts or the nominated loading area.
In apartment buildings this becomes part of the broader logistics plan because the waste route may continue through apartment entries, common corridors and booked lifts before reaching the disposal vehicle.
Floor-To-Ceiling Windows Can Also Be A Strata Issue
Protection around glazing has another Sydney-specific dimension.
NSW Government strata guidance identifies windows, window locks, balconies and balcony doors among items generally maintained by the owners corporation, although the particular strata plan and by-laws should always be checked for the individual building.
The same NSW guidance identifies the concrete slab as an owners corporation responsibility in the usual strata context.
This means a floor removal project can occur inside a privately occupied apartment while working immediately beside building elements for which the responsibility may sit elsewhere.
Owners planning works should therefore review the NSW Government guidance on strata repairs and common property and confirm the specific strata plan and by-laws rather than assuming the window assembly belongs solely to the apartment owner.
Where renovations affect common property, the NSW strata renovation rules also make approval and by-law requirements relevant depending on the scope.
Temporary protection of a frame is very different from altering the frame itself, but the project team should know where that boundary sits before demolition starts.
The Frame Should Not Become The Dust-Control System
Dust control and frame protection need to operate together.
Magnesite removal can be followed by scraping, mechanical surface preparation and concrete grinding. When concrete or other silica-containing construction materials are processed, SafeWork NSW requires appropriate controls for respirable crystalline silica exposure.
SafeWork NSW identifies on-tool dust capture and appropriate wet control methods as measures that can reduce exposure during relevant construction work.
For the façade interface, that means dust should be captured through the work process rather than simply allowed to settle inside window tracks and be cleaned afterwards.
Practical considerations include:
- On-tool dust extraction where appropriate to the task.
- Suitable extraction equipment for the hazard being controlled.
- Keeping window and sliding-door tracks covered during dusty work.
- Removing accumulated material progressively rather than allowing it to build up.
- Avoiding uncontrolled dry sweeping of hazardous construction dust.
- Cleaning the protected frame area before protection is removed.
Project teams can review current SafeWork NSW crystalline silica guidance when concrete or other silica-containing materials are being mechanically processed.
Older Flooring Systems Can Reveal A Different Hazard After Removal Starts
Magnesite should not automatically be treated as evidence that asbestos is present. They are separate issues.
Older Sydney apartments can, however, contain multiple generations of flooring products, adhesives, backing materials, patch compounds and previous renovation layers.
If an unidentified material is exposed during demolition and there is a reasonable concern that it could contain asbestos, further disturbance should not simply continue on assumption. The material should be dealt with under the appropriate identification and asbestos-management process.
SafeWork NSW provides current asbestos safety guidance for NSW workplaces and renovation activity.
Protection Changes The Quote Because Perimeter Complexity Is Labour
Two apartments with the same floor area can have very different removal requirements.
Consider an open apartment with minimal fixed interfaces compared with an apartment where full-height glazing wraps around two sides of the living area and several bedrooms.
The nominal number of square metres may be identical. The second project contains substantially more delicate perimeter.
Cost and programme can therefore be influenced by:
- Total linear metres of glazing adjoining the demolition area.
- Number of sliding doors and recessed tracks.
- Condition and value of existing aluminium finishes.
- Difficulty installing temporary protection.
- Amount of detailed perimeter removal required.
- Need for smaller machinery or hand work.
- Dust-control requirements.
- Strata work windows and noise restrictions.
- Lift bookings and waste movements.
- Substrate preparation required after the magnesite is removed.
A quote that considers only square metres can therefore miss the part of the room carrying the greatest damage exposure.
The New Floor Height Must Be Considered Before The Old Floor Disappears
Aluminium frames are also fixed reference points for the floor that comes next.
Removing a thick existing floor system can leave the exposed concrete significantly below a sliding-door threshold or aluminium sill. That difference eventually needs to be resolved through the new floor build-up, substrate repair, levelling or transition detail.
The useful measurement is therefore not only the thickness of the magnesite being removed.
The project team should understand:
- The existing top-of-floor height.
- The exposed slab level after removal.
- The fixed aluminium track or sill height.
- The planned new flooring thickness.
- Adhesive or underlay build-up.
- Any required floor levelling.
- Door operation and clearance.
Where substrate correction is required, Elyment's self-levelling compound Sydney service provides a related pathway for preparing the exposed floor for its next finish.
Levelling should still be calculated from the actual post-removal condition rather than assumed before demolition.
A Better Scope Separates Four Different Responsibilities
Premium apartment renovations become easier to manage when the protection responsibilities are explicit.
- Existing-condition responsibility
- What should be clear before work starts: What scratches, dents, sealant defects or frame damage already exist?
- Temporary-protection responsibility
- What should be clear before work starts: Who installs, maintains, inspects and eventually removes frame and glazing protection?
- Demolition responsibility
- What should be clear before work starts: Where does normal machine removal stop and detailed perimeter work begin?
- Post-removal responsibility
- What should be clear before work starts: Who checks substrate height, edge preparation, tracks and readiness for the next flooring stage?
These are small distinctions on paper, but they can prevent significant disagreement when several trades are moving through the apartment.
What A Proper Completion Check Looks Like
Frame protection should not disappear the moment the last piece of magnesite is removed.
The final inspection is best completed systematically.
- Remove loose demolition waste from the perimeter.
- Vacuum or clean the working area using methods appropriate to the dust hazard.
- Inspect exposed concrete immediately beside the frame.
- Check aluminium rails, corners and sliding-door tracks before removing all protection.
- Remove temporary protection carefully.
- Inspect the underlying aluminium finish against the pre-work photographs.
- Clear residual debris from tracks without damaging seals or finishes.
- Photograph the completed interface.
- Record the post-removal floor height where it affects the next flooring stage.
The room can then move from demolition into concrete preparation, levelling or flooring installation with the façade condition documented rather than assumed.
The Operational Lesson For Sydney Renovations
Floor-to-ceiling windows do not make magnesite removal impractical. They make the perimeter more important.
The strongest delivery approach treats aluminium glazing as its own work interface. Existing conditions are documented, protection is installed deliberately, the open floor is removed without crowding the façade, large equipment gives way to controlled perimeter methods and the interface is cleaned and inspected before handover.
For apartment owners, strata managers, builders and project teams, this approach also creates clearer responsibility if the windows, doors, tracks or concrete slab intersect with common-property obligations.
The wider lesson is applicable well beyond magnesite. Demolition quality is often determined not by how quickly the centre of a floor can be removed, but by how carefully the work meets the parts of the building that are staying.
MAGNESITE REMOVAL & INTERFACE PLANNING
Review The Glazing Perimeter Before Demolition Reaches The Frame
Review aluminium-frame protection, perimeter removal, strata interfaces, dust controls, waste movements, substrate preparation and finished-floor heights before magnesite removal begins.
Questions To Resolve Before Magnesite Removal Starts
- Has the condition of every adjoining aluminium frame been photographed?
- Are the windows or balcony doors common property under the scheme?
- What material will protect the aluminium without damaging its finish?
- How will low-level glass be protected from demolition fragments?
- Where does the controlled perimeter demolition zone begin?
- Which equipment will be used for detailed work near the frames?
- How will sliding-door tracks be kept free from debris?
- Where will removed material travel so waste does not accumulate against the glazing?
- What dust-control requirements apply to subsequent concrete preparation?
- What will the floor level be after the magnesite is removed?
- Has the next flooring build-up been checked against the fixed aluminium thresholds?
- Who completes and records the final frame inspection?
Sources And Reference Points
- NSW Government: Strata repairs and maintenance
- NSW Government: Strata renovation rules
- SafeWork NSW: Crystalline silica
- SafeWork NSW: Asbestos
- Elyment: Magnesite Removal Sydney
- Elyment: Concrete Grinding Edge Work Around Door Tracks And Fixed Interfaces
- Elyment: Self-Levelling Compound Sydney
Review The Glazing Perimeter Before Demolition Reaches The Frame
Review aluminium-frame protection, perimeter removal, strata interfaces, dust controls, waste movements, substrate preparation and finished-floor heights before magnesite removal begins.
Request a ReviewRelevant next actions
Explore the ELYMENT service most closely connected to this article.